


The modern garden is no longer just a patch of grass to be mowed on a Sunday morning; it is arguably the most important room in your house, it just happens to be outside.
Over the last few years, the “outdoor living” trend has completely reshaped how we view our exterior spaces. Families and avid gardeners alike are ditching the concept of the garden as a purely decorative space and transforming it into a functional extension of their homes. We want outdoor kitchens, cozy lounge areas, and dedicated spaces to host long, lazy summer BBQs that stretch late into the warm evenings.
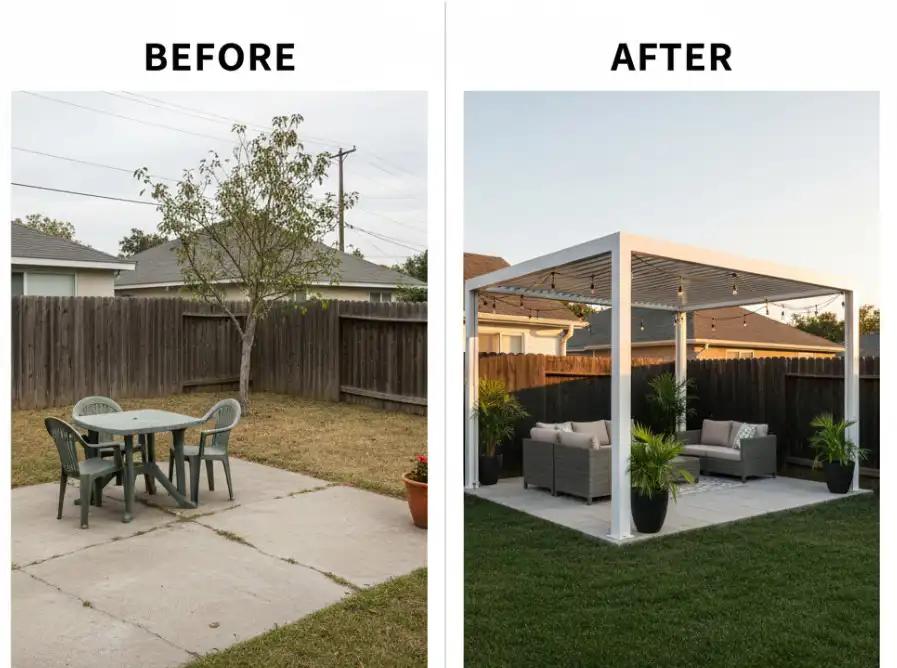
At the heart of this garden revolution is the wooden pergola. A pergola instantly zones your garden, provides essential dappled shade during the midday heat, and creates a stunning architectural focal point. And the best part? You don’t need to hire an expensive landscaping crew to get one.
With a weekend, a willing helper, and a high-quality B&Q wooden pergola kit, you can build your own backyard sanctuary. Here is your comprehensive, beginner-friendly guide to laying a decking base, erecting your pergola, and styling it for the ultimate summer experience.
Why Choose a B&Q Wooden Pergola?
Before we dive into the heavy lifting, it is worth understanding why a timber pergola from a trusted retailer like B&Q is the ideal choice for the DIY gardener.
First, the kits take the guesswork out of carpentry. The timber is pre-cut, pre-treated, and designed to fit together seamlessly, saving you hours of measuring and sawing. Second, wood offers a timeless, organic aesthetic that blends naturally into a garden environment, unlike harsh metal or plastic alternatives. Finally, a pergola adds immediate structural height to your garden, drawing the eye upward and making even modest outdoor spaces feel grander and more purposefully designed.
Phase 1: The Weekend Warrior’s Preparation
Any successful DIY project is won or lost in the planning phase. Rushing into the build without preparing your ground and gathering your tools is a recipe for a wobbly structure and a frustrating weekend.
The Essential Tools and Materials List
Before you start, make sure you have the following ready to go:
For the Decking Base:
- Treated timber joists
- Decking boards
- Weed control fabric
- Gravel or pea shingle
- Decking screws (rust-resistant)
- Spade and landscaping rake
For the Pergola Build:
- Your chosen B&Q Wooden Pergola Kit
- Metal post supports (bolt-down or spike, depending on your base)
- Heavy-duty drill with screwdriver bits
- Spirit level (crucial for a professional finish)
- Tape measure and pencil
- A sturdy stepladder
- A second pair of hands (this is a strict two-person job!)
Choosing the Location
Select a spot in your garden that receives good sunlight but won’t dominate the entire lawn. Consider the flow of traffic from your kitchen to the pergola, nobody wants to carry a tray of marinated BBQ chicken through a maze of bushes. Ensure the ground is relatively level and free from large roots or underground utilities.
Phase 2: Laying the Decking Foundation
While you can install a pergola over patio slabs or grass, a raised timber deck provides the perfect, level “floor” for your new outdoor room. It defines the space beautifully and keeps your outdoor furniture away from damp soil.
Step 1: Clear and Level the Ground
Measure out the footprint of your new decking. Use a spade to clear away the top layer of turf and soil, digging down roughly 50mm. Use a spirit level on a long, straight piece of timber to ensure the ground is as level as possible.
Step 2: Lay the Weed Membrane
Roll out heavy-duty weed control fabric over the cleared area. Overlap the edges by at least 10cm. This is a critical step; skipping it means you will spend the rest of your summers trying to pull weeds that are growing up through the gaps in your beautiful new deck. Pin the fabric down and cover it with a thin layer of gravel to keep it in place.
Step 3: Build the Sub-Frame
Using your treated timber joists, build an outer square or rectangle frame. Then, add internal supporting joists spaced about 400mm apart. Ensure the entire frame is completely level. If the ground is slightly uneven, you can use small pieces of slate or treated timber offcuts under the joists to pack them up until the bubble on your spirit level is perfectly centered.
Step 4: Secure the Decking Boards
Starting from the front edge, lay your decking boards across the joists. Leave a 5mm expansion gap between each board (a simple trick is to use a large nail or a designated spacer between the boards as you screw them down). Drive two decking screws into the board wherever it crosses a joist. Continue this process until the entire frame is covered.
You now have a beautiful, solid stage for your pergola.
Phase 3: Erecting Your B&Q Pergola
With your decking complete, it is time for the main event. Unpack your B&Q pergola kit and lay all the components out on the lawn. Check the inventory list in the instructions to ensure nothing is missing before you begin.
Step 1: Secure the Corner Posts
Your pergola needs to be anchored securely to withstand high winds. Because you have built a solid timber deck, you will use bolt-down metal post supports.
- Measure and mark exactly where the four corner posts will sit on the deck.
- Bolt the metal post supports securely into the decking boards and the heavy joists underneath them.
- Slot the four upright timber posts into the metal supports. Use your spirit level on two adjacent sides of each post to ensure they are perfectly plumb (vertical), then tighten the bolts to lock them in place.
Step 2: Attach the Support Beams
This is where you need your helper. The main support beams run horizontally across the top of the upright posts.
- Lift the first main beam into place. B&Q pergolas usually feature notched ends that sit neatly over the uprights.
- While your helper holds the beam steady, use your spirit level to check the horizontal alignment.
- Once level, drill pilot holes and drive the provided heavy-duty coach screws through the beam and into the upright post.
- Repeat this for the opposite side.
Step 3: Install the Roof Rafters
The final structural step is adding the cross rafters that create the classic pergola “roof.”
- Lift the rafters and slot them into the notches on the main support beams.
- Space them evenly according to your instruction manual.
- Once you are happy with the spacing, secure each rafter in place with screws.
Step back and admire your work. You have successfully built the architecture of your new outdoor living room!
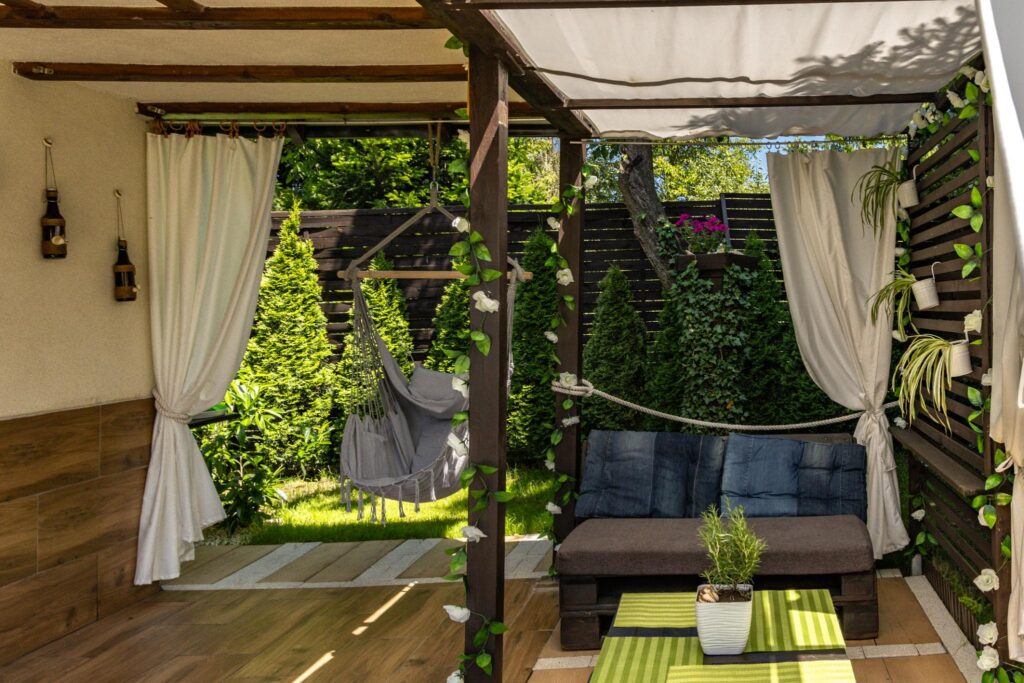
Phase 4: The Finishing Touches – Styling for Summer
A bare wooden frame is nice, but it is the styling that transforms a DIY project into a magazine-worthy outdoor sanctuary. This is where you bring the space to life.
Let There Be Light
No summer BBQ is complete without magical evening lighting. The absolute best way to elevate your pergola is by hanging heavy-duty, warm-white festoon string lights.
- How to hang them: Screw small, rust-resistant cup hooks onto the inside of the pergola rafters. Zig-zag the string lights back and forth across the “ceiling” of the pergola. This provides a beautiful canopy of ambient light that allows your outdoor dinners to continue long after the sun goes down.
Introduce Climbing Plants
A pergola truly belongs in a garden when nature is allowed to reclaim it. Plant climbing vines at the base of the corner posts.
- Best choices: Star Jasmine is incredible for its fast growth and intoxicating summer scent. Honeysuckle and climbing roses are excellent traditional choices. Alternatively, grapevines can give your garden a spectacular Mediterranean feel. As the plants grow, gently tie them to the posts using garden twine until they reach the roof.
Zone the Space
Treat the space underneath the pergola exactly like an indoor room.
- The Lounge Zone: Add an outdoor rug to soften the decking. Bring in a modular rattan sofa or a set of deep, comfortable Adirondack chairs. Add weather-resistant throw pillows for a pop of color.
- The Dining Zone: If BBQs are your main focus, position a sturdy wooden dining table in the center. Keep the grill just outside the edge of the pergola to prevent smoke from getting trapped under the canopy, but keep the dining area shaded and protected.
Warmth for the Evening
British and North American summers are notorious for chilly late evenings. Invest in a stylish fire pit or a tall patio heater to place nearby. Provide a basket of cozy throw blankets for your guests to grab when the temperature drops.
Long-Term Maintenance: Protecting Your Investment
Your B&Q pergola and decking are built to last, but timber requires a little love to survive harsh winters and wet springs.
- Annual Cleaning: At the start of every summer, sweep the deck thoroughly and use a stiff brush with warm soapy water (or a specialized deck cleaner) to remove algae and dirt.
- Treatment: Although B&Q timber is pre-treated, applying a high-quality clear wood preservative or a colored wood stain every two years will protect the wood from UV damage and moisture, preventing rot and keeping the timber looking fresh.
- Check the Hardware: Wood naturally expands and contracts with the seasons. Once a year, go around with your drill and tighten up any bolts or screws that may have worked themselves loose.