


There is a very specific type of chill that settles into a UK home come November. It is a damp, pervasive cold that seems to bypass your clothes and settle directly into your bones. If you live in a classic Victorian terraced house, you know exactly what this feels like. These homes, with their high ceilings, beautiful bay windows, and solid brick walls, are architectural treasures. They are also, historically speaking, absolute nightmares to keep warm.
For decades, the UK’s solution to a draughty house was simple: just turn the thermostat up. But with the reality of modern energy price caps and the volatile cost of gas and electricity, cranking up the boiler is no longer a viable financial strategy. Heating a home inefficiently is quite literally burning money and watching the exhaust vent out of your roof.
The good news? You do not need to spend thousands of pounds on a whole-house retrofit, solar panels, or a heat pump to make a massive dent in your energy consumption. The most cost-effective energy-saving measures are surprisingly analog, heavily grounded in basic physics, and easily achievable in a single weekend.
Whether you are a homeowner looking to protect your investment or a renter trying to survive the winter without freezing or going broke, your local B&Q holds the key. Armed with a few specific materials, namely radiator foil, weather-stripping tape, and loft insulation rolls, you can dramatically transform how your home retains heat.
Here is your comprehensive, step-by-step weekend DIY guide for B&Q to lowering your UK heating bills.
The Anatomy of Heat Loss in a UK Home
Before you grab a shopping trolley, it helps to understand your enemy: heat loss. Heating your home is like pouring water into a bucket. If the bucket has holes in it, it doesn’t matter how fast you pour the water; the bucket will eventually empty.
In a standard uninsulated UK home, heat escapes in a highly predictable pattern:
- 25% disappears straight up through the roof.
- 35% bleeds out through the walls.
- 15% slips out through the floor.
- 25% is lost through draughts and windows.
Your weekend mission is to plug the most accessible holes in this bucket. You are going to stop your radiators from heating the street, seal the gaps around your windows, and put a thick winter coat on your ceiling.
Your B&Q Friday Night Shopping List
To execute this weekend warrior project, head to the DIY store and pick up the following:
- Radiator Reflector Foil: (Look for brands like Diall or Radflek). You’ll need enough rolls to cover the back of every radiator mounted on an external wall.
- Weather-Stripping Tape / Draught Excluders: Get a mix of foam tape for small window gaps and brush strips for the bottom of exterior doors. Don’t forget a letterbox draught excluder!
- Loft Insulation Rolls: (Homeowners only). Current UK guidelines recommend a depth of 270mm. Check your current depth and buy enough Diall loft rolls to top it up.
- Supplies: A sharp utility knife, heavy-duty double-sided tape, a tape measure, and (if doing the loft) a disposable coverall, goggles, and a dust mask.
Saturday Morning: The Radiator Foil Hack (Renters & Homeowners)
Time required: 1-2 hours Skill level: Beginner
Let’s start with the easiest, highest-ROI project on the list: radiator reflector foil.
In a Victorian terrace, radiators are almost always placed on external walls, usually under the windows. From a physics standpoint, a radiator emits heat in all directions. This means 50% of the heat you are paying for is being pushed directly into the cold, solid brick wall behind it, seeping out into the freezing British air.
Radiator foil stops this dead. It is a specialized, heat-reflective silver material (often backed with insulating foam) that bounces the thermal energy back into your room.
How to Install It:
- Measure Twice, Cut Once: Turn your heating off and let the radiators cool. Measure the distance between the wall brackets holding your radiator, and measure the height of the radiator from the top to the bottom.
- Cut the Foil: Unroll your B&Q radiator foil and use your utility knife to cut panels that are slightly smaller than the radiator itself (so the foil remains invisible when you look at the radiator from the front). Cut slits at the bottom to accommodate the wall brackets.
- Stick it to the Wall: Most standard radiator foils require double-sided adhesive pads (often included in the pack). Stick the pads to the corners of the foil, slide the foil down behind the radiator, and press it firmly against the wall.
- The Result: Turn your heating back on. Within twenty minutes, you will notice the room warms up faster, and you can likely turn your thermostat down by a degree or two while maintaining the same level of comfort.
Renter’s Note: This is 100% renter-friendly. The adhesive pads can be easily peeled off the wall without damaging the paint when your tenancy ends.
Saturday Afternoon: Defeating the Draughts (Renters & Homeowners)
Time required: 2–3 hours Skill level: Beginner
A cold draught moving across your ankles can make a house feel freezing, even if the ambient temperature is 20 degrees. Victorian homes are notorious for draughts, original timber sash windows rattle, heavy front doors warp over time, and exposed floorboards let up cold air from the crawlspace.
Draught-proofing is essentially weather-stripping your home to ensure the expensive hot air stays in and the bitter winter wind stays out.
Tackling Windows and Doors:
- The Paper Test: Close your windows and doors on a piece of paper. If you can easily pull the paper out without it tearing, you have a gap that is letting in cold air.
- Applying Foam Tape: For windows and the frames of internal doors leading to cold hallways, B&Q sells rolls of self-adhesive E-profile or P-profile foam tape. Clean the window frame with soapy water, let it dry completely, peel the backing off the tape, and stick it along the frame where the window meets it.
- The Front Door Defenses: Your front door is a massive thermal vulnerability. Install a brush strip excluder along the very bottom of the door using small screws. Next, tackle the letterbox. An open letterbox is literally a hole in your front door. Swap it out for a heavy-duty draught-proof letterbox cover (one with brushes on the inside). Finally, fit a simple swing-cover over your keyhole.
By eliminating these micro-breezes, your boiler won’t have to cycle on and off as frequently to maintain the ambient temperature in your living spaces.
Sunday: Conquering the Loft (Homeowners)
Time required: 4-6 hours Skill level: Intermediate
Now we move to the heavy hitter. If you own your home and you have an uninsulated (or poorly insulated) loft, you are losing a quarter of your heat straight through the roof tiles.
Historically, UK homes were built with 100mm of loft insulation (or less). Today, the Energy Saving Trust recommends a minimum depth of 270mm. Upgrading your loft insulation is one of the most impactful things you can do to lower your EPC rating and your energy bills.
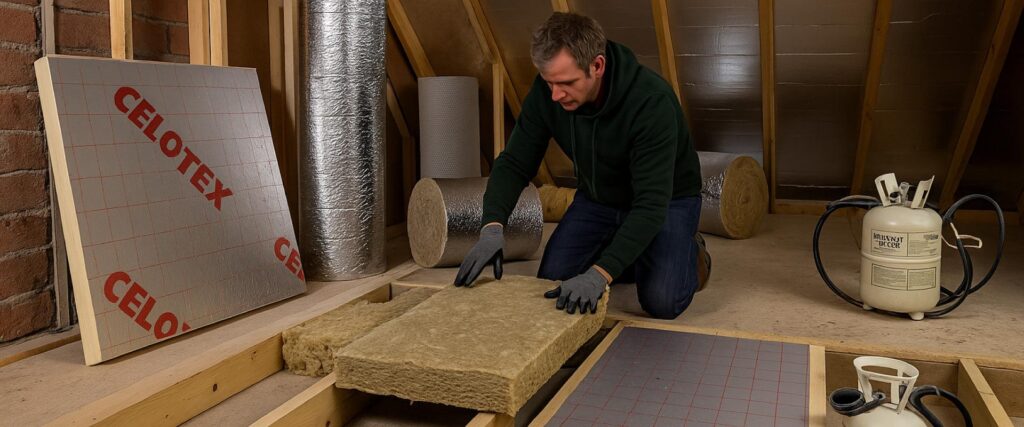
B&Q sells massive rolls of mineral wool or glass mineral wool insulation. It is bulky, but it is incredibly effective.
The Installation Process:
- Safety First: Lofts are dusty, and fiberglass insulation is highly irritating to the skin and lungs. Wear a disposable paper coverall, a high-quality dust mask, safety goggles, and heavy-duty gloves. Furthermore, only ever step on the wooden joists, never on the plasterboard ceiling between them, or you will fall through into the bedroom below.
- Assess the Base Layer: If you have existing insulation between the joists that is in good condition, you can leave it. If the joists are bare, roll out a base layer (usually 100mm thick) directly between the wooden joists.
- The Cross-Hatch Method: To reach the 270mm target, you need to add a top layer (170mm or 200mm rolls). Crucial step: Do not roll this parallel to the joists. You must roll this top layer perpendicular (at a 90-degree angle) across the joists. This cross-hatching eliminates the thermal bridges created by the exposed wood and creates a continuous blanket of insulation.
- Mind the Gaps and Vents: Do not push the insulation all the way to the very edges of the eaves. Your roof needs airflow to prevent condensation and dampness. Leave a small gap at the eaves so the roof timbers can breathe. Do not insulate directly over recessed LED ceiling lights unless they are specifically rated for it, as this poses a fire risk.
Once you have unrolled that final layer and closed the loft hatch, the difference will be noticeable by sunset. The upper floors of your Victorian terrace will trap the heat rising from the ground floor, keeping the bedrooms drastically warmer overnight.
The Final Touches: Boiler Tweaks and Curtains
Before the weekend ends, perform these two zero-cost maintenance tasks:
- Bleed Your Radiators: If your radiators are cold at the top and hot at the bottom, there is air trapped inside them. Buy a 50p radiator key from B&Q, hold an old towel under the valve, and open it slightly until you hear a hissing sound. Once water starts to drip out, close it. This ensures the radiator fills completely with hot water, maximizing its efficiency.
- Check Your Flow Temperature: If you have a condensing combi-boiler, check the “flow temperature” (the temperature of the water it sends to the radiators). Many boilers are set at 80°C by default. Lowering this to 60°C will make your boiler operate in its highly efficient “condensing mode,” saving you up to 8% on your gas bill without making your rooms noticeably cooler.
The ROI of Your DIY Weekend
Living in a Victorian terraced house does not mean you are condemned to wearing a winter coat indoors. By taking control of your home’s thermal envelope, you are shifting the balance of power back in your favor.
A weekend trip to B&Q and a few hours of measuring, cutting, and rolling can save the average UK household hundreds of pounds a year on energy bills. More importantly, it transforms a draughty, cold property into a genuinely comfortable, cozy sanctuary.
You cannot control the wholesale price of global gas, but you can absolutely control how much of it escapes through your roof. Grab your tape measure, roll up your sleeves, and take your warmth back.